A subdomain is one way of organizing and separating content on your site.
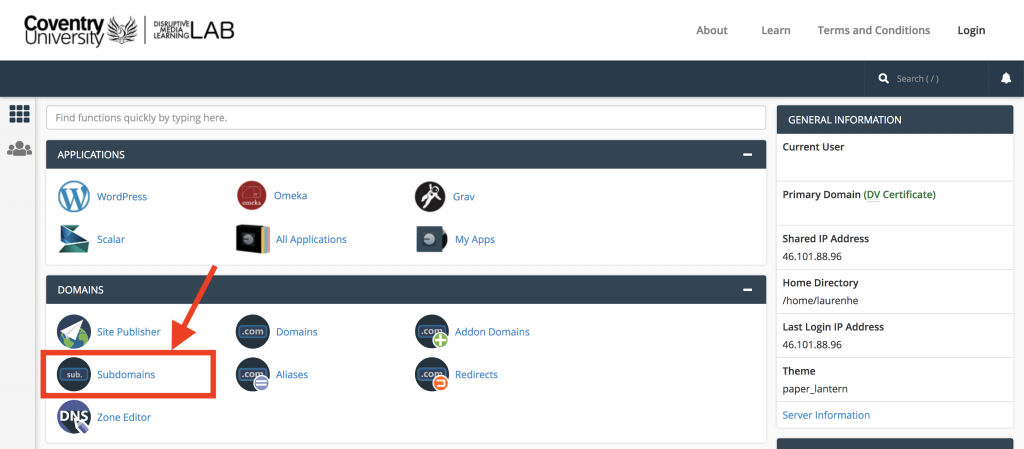
To get started login to your Coventry.Domains account. Once logged in you’ll be at the homepage of your control panel. The easiest way to navigate the panel is using the search feature in the top right panel. Click the Search box and type “subdomains” (without the quotes). As you type, the cPanel page will begin to narrow down results, and soon the only visible option will be Subdomains. Click the Subdomains button to continue.
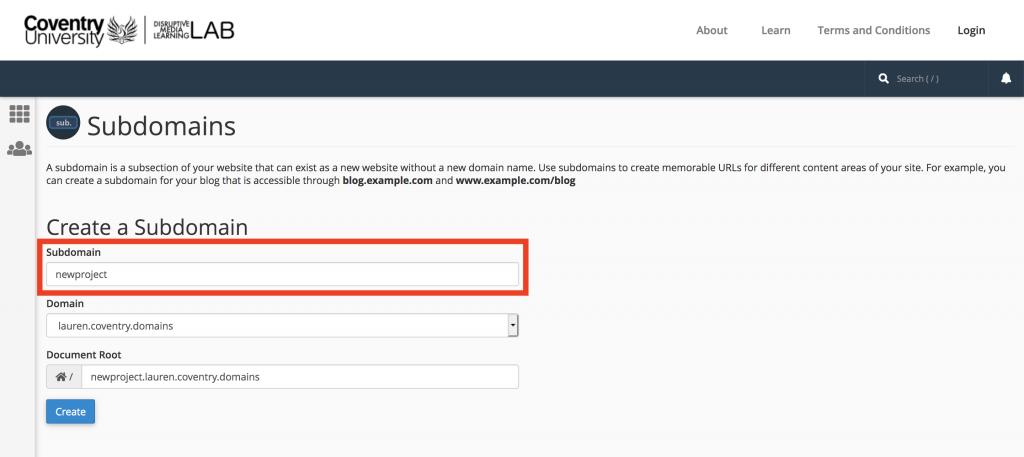
Choose a name for your subdomain and type it into the Subdomain box. Just like any domain name, subdomains can only contain numbers, letters, and hyphens, and the best subdomains are simple, short, and descriptive.
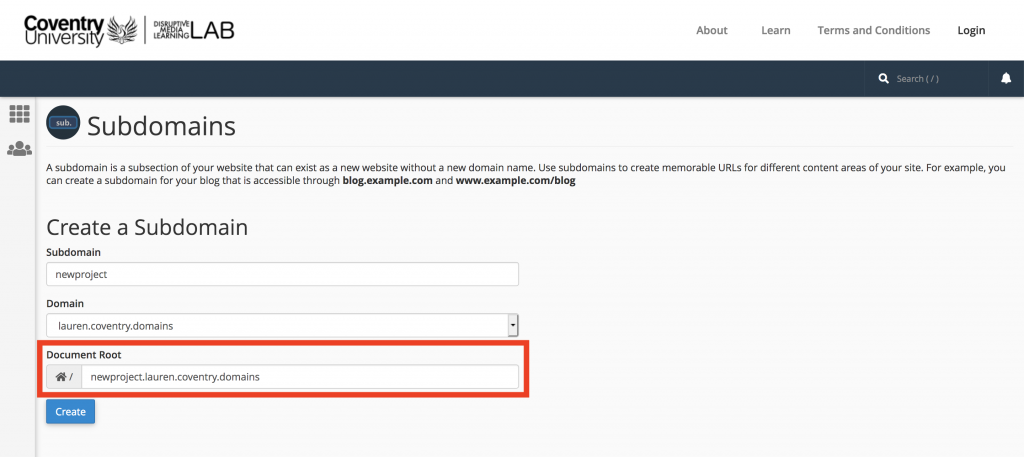
Once you’ve typed in a name, cPanel will automatically populate the Document root field for you. This will create a folder to contain your subdomain’s files. You’ll usually want this folder to match the name of your subdomain, so it’s easy to identify where different files live in your account. You might want to change the document root if you already have a folder in your account that has the same name as the subdomain you are trying to create, although this should be rare. Once you’re done, click Create.
Once you’re done, click the ‘Create’ button. If everything went well, you should see a message that your subdomain was created successfully. Your subdomain will now be available as an option for automatic installation of various software (WordPress, MediaWiki, etc). If you prefer to install web applications manually, you can do so in the document root (folder) you created for this new subdomain.
This content is adapted from the Create Documentation by The University of Oklahoma’s Center for Teaching Excellence which is licensed under a Creative Commons Attribution-ShareAlike 4.0 International License.
